Using policies
This page shows you how to control access to your resources on Acacia. Using policies you can give list, upload, download, and delete permissions to other Acacia users and projects.
What makes up a policy?
Policies consist of a JSON formatted text file which contain the following basic elements (for a complete description see AWS Identity and Access Management (external link)):
- Effect - this can be either allow or deny.
- Principal - the user or project for which the policy determines access to your resources.
- Action - the S3 operation which is affected by this policy. These include CreateBucket, DeleteBucket, DeleteObject, GetObject, ListBucket, PutBucketPolicy, PutObject. For the full listing of supported actions see Ceph Bucket policies (external link).
- Resource - your resource to which the policy is to be applied.
A template policy file is shown below:
{
  "Statement": [{
    "Effect": "EFFECT",
    "Principal": {"AWS": ["arn:aws:iam::ACCOUNTID"]},
    "Action": "s3:ACTION",
    "Resource": ["arn:aws:s3:::BUCKET"]
  }]
}
To create a policy you can copy this template and create a file with a .json extension. You then substitute the appropriate information for each element into the file.
Client support
The policy file cannot be larger than 20 KB in size.
Policy example
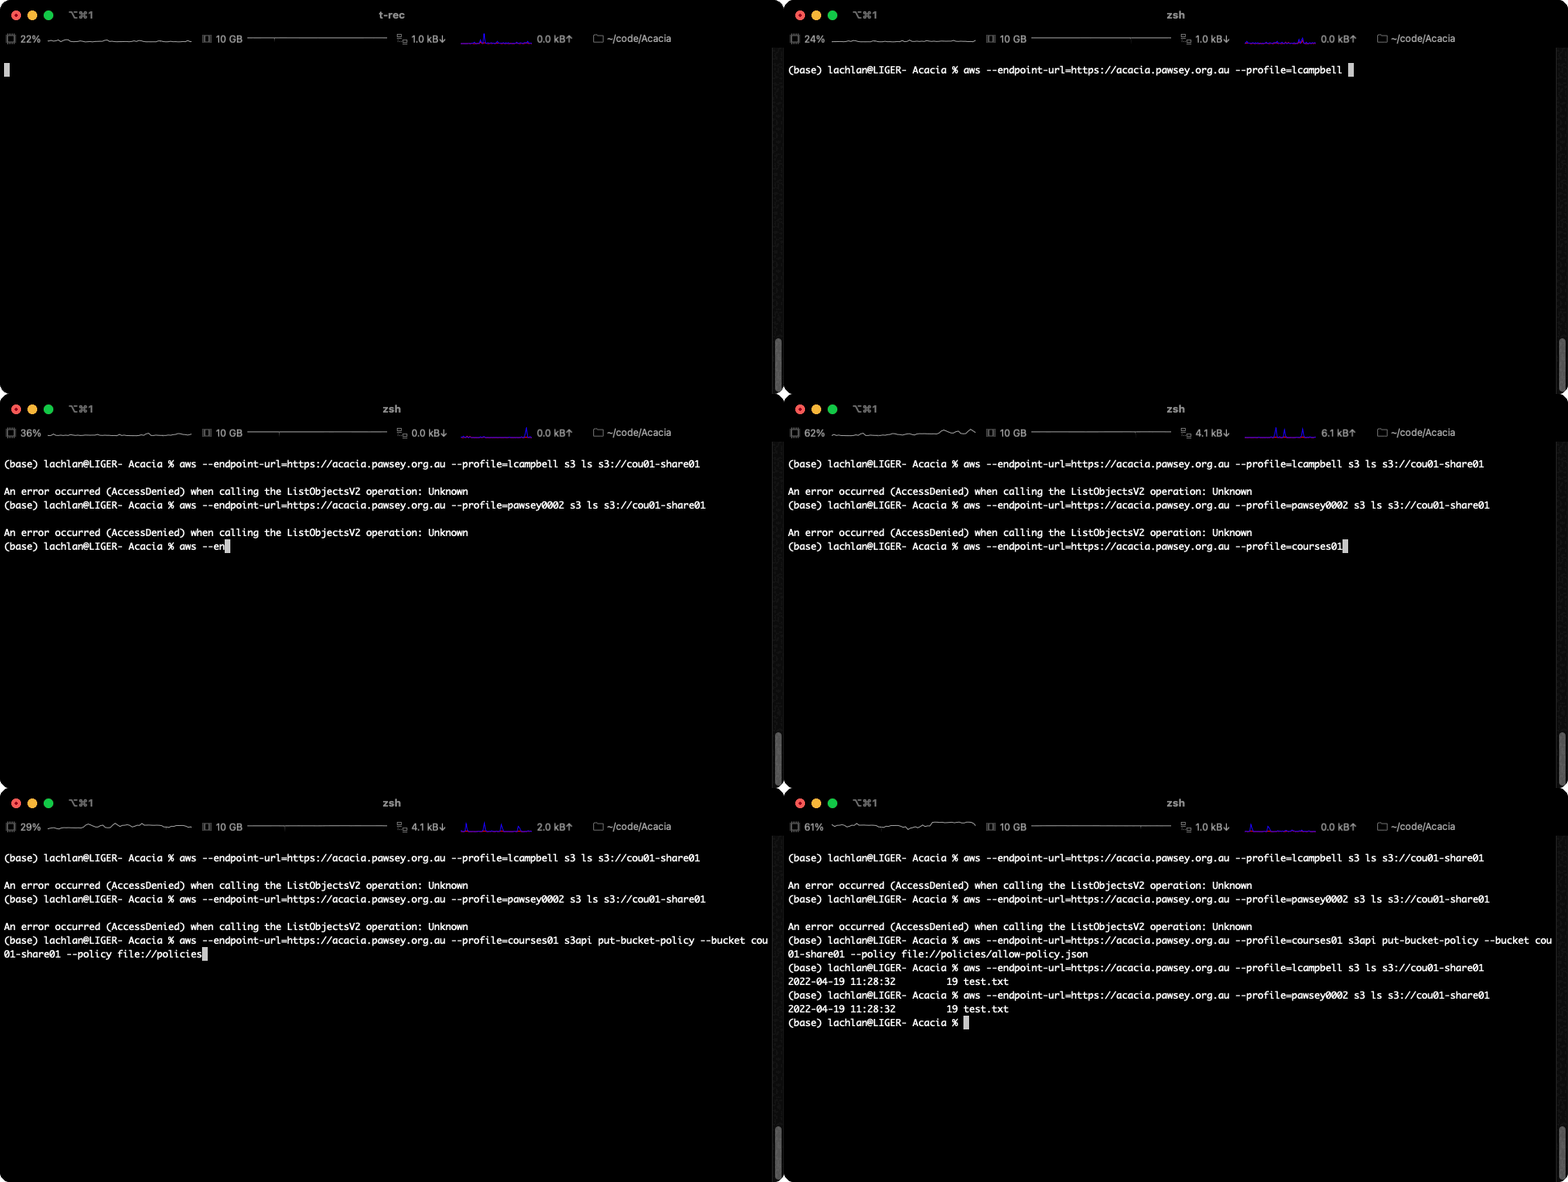
A single policy can include multiple accounts and actions. For example, if you wanted to give the user lcampbell and the project pawsey0002 permission to list the bucket cou01-share01 belonging to the project courses01 (of which you are a member), you would make the following substitutions:
EFFECT = Allow
ACCOUNTID = :user/USERNAME, ACCOUNTID = UUID:root
ACTION = ListBucket
BUCKET = cou01-share01
Client support
- When setting access for a user account on Acacia you require the username of the Pawsey account holder.
- Setting access for a project account requires the project's UUID which can be found on the S3 Keys page for the project on the Pawsey portal - if you are unsure how to access this see the section on credentials in Acacia - Quick Start.
{
  "Statement": [{
    "Effect": "Allow",
    "Principal": {"AWS": ["arn:aws:iam:::user/lcampbell","arn:aws:iam::0519d807c3a549c0b73cdc8244d6a0c5:root"]},
    "Action": "s3:ListBucket",
    "Resource": ["arn:aws:s3:::cou01-share01"]
  }]
}
Because the same action is being allowed the policy could be written with both accounts included in the Prinicipal (as above), or with separate elements for each account (as below). The result is identical and is a matter of preference and ease of use.
{
  "Version": "2012-10-17",
  "Statement": [{
    "Effect": "Allow",
    "Principal": {"AWS": ["arn:aws:iam:::user/lcampbell"]},
    "Action": "s3:ListBucket",
    "Resource": ["arn:aws:s3:::cou01-share01"]
  },
  {
    "Effect": "Allow",
    "Principal": {"AWS": ["arn:aws:iam::0519d807c3a549c0b73cdc8244d6a0c5:root"]},
    "Action": "s3:ListBucket",
    "Resource": ["arn:aws:s3:::cou01-share01"]
  }]
}
Wildcards in policies
In your bucket policy, you can use wildcard characters on Amazon Resource Names (ARNs) and other values to grant permissions to a subset of objects. For example, you can control access to groups of objects that begin with a common prefix or end with a given extension (Using wildcards in resource ARNs (external link).
If you wanted to add the ability to download all objects to the example policy, you would edit the policy file to include all objects in the resource using cou01-share01/*, and add the action s3:GetObject before re-applying the policy.
{
  "Version": "2012-10-17",
  "Statement": [{
    "Effect": "Allow",
    "Principal": {"AWS": ["arn:aws:iam:::user/lcampbell","arn:aws:iam:::0519d807c3a549c0b73cdc8244d6a0c5:root"]},
    "Action": ["s3:ListBucket", "S3:GetObject"],
    "Resource": ["arn:aws:s3:::cou01-share01", "arn:aws:s3:::cou01-share01/*"]
  }]
}
If you wanted to include only a particular type of object, for example only compressed zip files, you would use cou01-share01/*.zip.
Installing AWS S3 CLI
Once created or edited, you apply a policy to a bucket using the AWS S3 CLI which is available as a module on Setonix and can be installed on other systems by following the steps outlined below.
If you have any issues see the Amazon S3 documentation for complete instructions - Install or update the latest version of the AWS CLI (external link).
Once installed run aws configure and provide your credentials.
> aws configure

            > AWS Access Key ID [None]: <ACCESSKEY>

            > AWS Secret Access Key [None]: <SECRETKEY>

            > Default region name [None]:

            > Default output format [None]:
Confirm the creation of two files in your user directory ~/.aws, config and credential.
This creates the default profile, however you can add multiple profiles which provide credentials to a command. For example if you have a project allocation on Acacia as well as a user allocation you can create separate named profiles for each. You can configure additional profiles by using aws configure with the --profile option, or by manually adding entries to the config and credentials files. For examples refer to Named profiles for the AWS cli (external link)
For help with other configuration and credential settings run the help command.
> aws configure set help
Applying policies
To set a policy for a bucket use the S3api put-bucket-policy command:
> aws --endpoint-url=https://projects.pawsey.org.au --profile=<PROFILE_NAME> s3api put-bucket-policy --bucket <BUCKET_NAME> --policy file://<POLICY_FILE>
Where:
<PROFILE_NAME>the name of the account which has access control.<BUCKET_NAME>the name of the bucket to apply the policy to.<PATH>the path to the JSON policy file to apply.
Example:
